Wednesday 18 November 2020

Warmest Holiday Wishes for Eileen Hull Inspiration Team


https://elizabethr-thecraftyrobin.blogspot.com/2020/11/warmest-holiday-wishes-for-eileen-hull.html

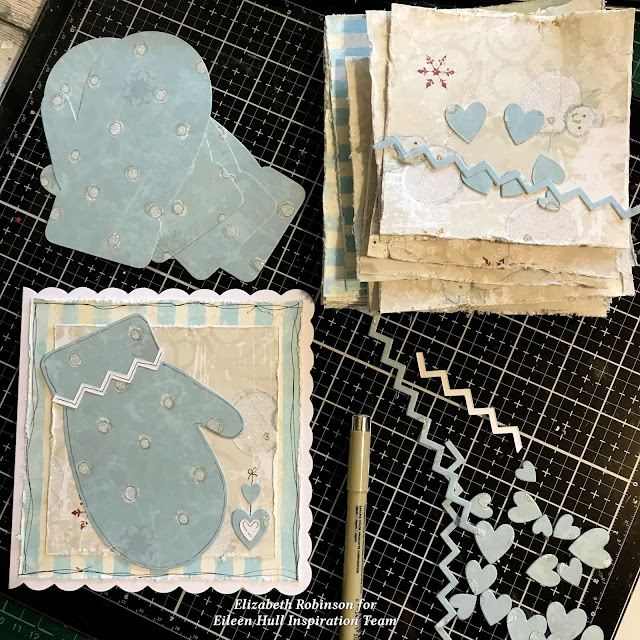
How on earth are we in November already........ Every year I promise myself that I'll be more organised and have all my cards ready, written and postage stamps stuck on, and guess what........nope.  Thank goodness for the Mittens Box Die, it's allowed me to batch make a pile of Christmas cards in no time at all. The steel rule die allows multiple layers of paper/lightweight card to be cut at once with no phaffing! Perfect for getting me back on track with my mission!

https://elizabethr-thecraftyrobin.blogspot.com/2020/11/warmest-holiday-wishes-for-eileen-hull.html

I used a pack of pre-made 6"x6" white card blancs from my stash, and the leftovers from an old Dovecraft paper pad. The striped base layer is 5 1/2" square, the next layer is 4 1/2" sqare and the hearts and zig zigs are the reverse of the blue paper. I prepped everything ready, and sat and glued everything together whilst watching tv. Simple. I finished off by adding a little doodling around the edges and created a bow for the hearts to hang from. I think the sentiment is from an older Anna Griffin kit it lives solo, so I'm not entirely sure.

https://elizabethr-thecraftyrobin.blogspot.com/2020/11/warmest-holiday-wishes-for-eileen-hull.html
 

And a happy little accident, I made a bookmark :) The paper was folded in half and tucked inside of the cutting line on one side of the die. The top of the mitten is glued  to create the "L" shape needed to fit the corner of the page. How simple is that, but what a cute inexpensive gift to pop in your card.

Happy Crafting.

Elizabeth x

Eileen Hull Etsy Shop

Eileen Hull Fan Page on Facebook 

Eileen Hull Designs

Wednesday 21 October 2020

Tea for Two - Eileen Hull New Release Die

 https://elizabethr-thecraftyrobin.blogspot.com/2020/10/tea-for-two-eileen-hull-new-release-die.html

Remember the blog hop at the start of the month, where I shared my "Shoe Fund" box? Well now it's the turn of the "Tea for Two" project.
https://elizabethr-thecraftyrobin.blogspot.com/2020/10/tea-for-two-eileen-hull-new-release-die.html

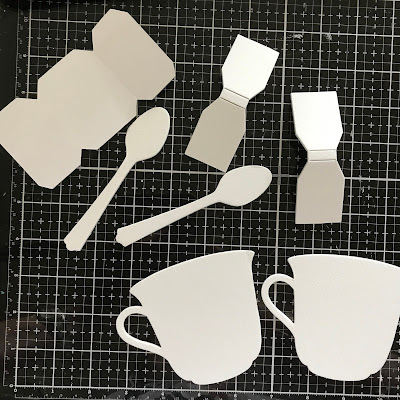
First I adhered a sheet of watercolour card to a piece of Matt Board before running it through my Big Shot Plus.

https://elizabethr-thecraftyrobin.blogspot.com/2020/10/tea-for-two-eileen-hull-new-release-die.html

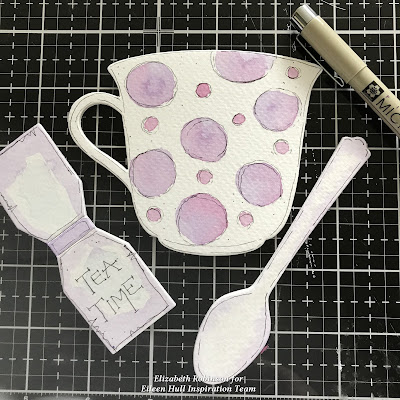
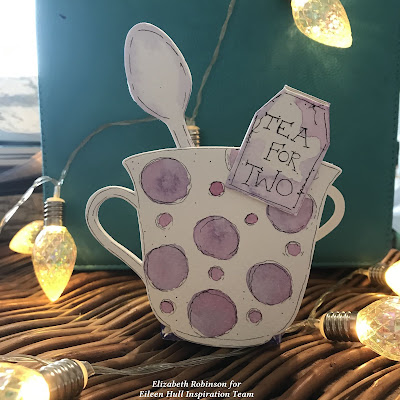
I painted dots on one tea cup and blousy flowers on the other one. I want the finished project to be different on each side, but the colours to still co-ordinate.

https://elizabethr-thecraftyrobin.blogspot.com/2020/10/tea-for-two-eileen-hull-new-release-die.html

Once I'd added colour to all the elements, I set them aside to dry naturally due to the adhesive sheet, you don't want to heat that up as it will buckle.

https://elizabethr-thecraftyrobin.blogspot.com/2020/10/tea-for-two-eileen-hull-new-release-die.html

Once the watercolour had dried, I went over and doodled fine detail using a Micron pen. Suddenly now those blobs of watercolour take shape, and flowers and leaves appear.


https://elizabethr-thecraftyrobin.blogspot.com/2020/10/tea-for-two-eileen-hull-new-release-die.html

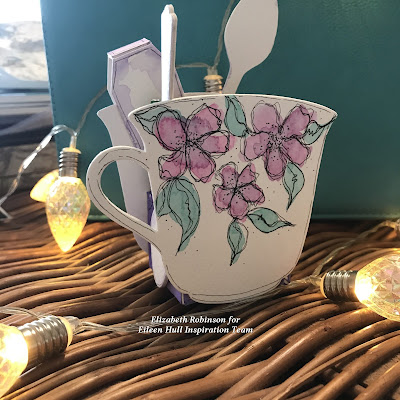
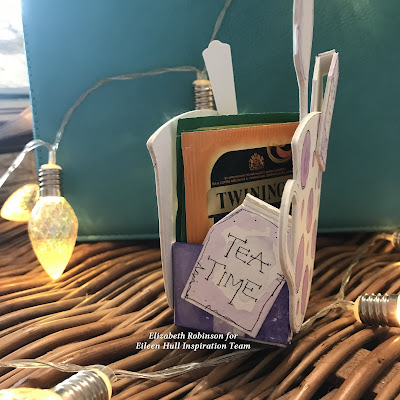
I doodled around all the edges, and added details to the tea bags. I assembled the box element between the two cups and decorated using the spoons and tea bags.

https://elizabethr-thecraftyrobin.blogspot.com/2020/10/tea-for-two-eileen-hull-new-release-die.html


https://elizabethr-thecraftyrobin.blogspot.com/2020/10/tea-for-two-eileen-hull-new-release-die.html


https://elizabethr-thecraftyrobin.blogspot.com/2020/10/tea-for-two-eileen-hull-new-release-die.html


https://elizabethr-thecraftyrobin.blogspot.com/2020/10/tea-for-two-eileen-hull-new-release-die.html

How cute is the finished project, and what an amazing gift it would make. Have fun and don't forget to share your make in the Eileen Hull Fan Page on Facebook. The link is below.

Happy Crafting,

Elizabeth x

Eileen Hull Fan Page Facebook

Eileen Hull Etsy Shop 

Thursday 1 October 2020

Eileen Hull New Sizzix Release

 Hooray- two new ScoreBoards releases from Eileen Hull and Sizzix! Are you ready for a new 3D Bigz L Tea Cup die? Fill it with teabags and other assorted goodies or use the Tea Cup cutout on the front of a card- so many possibilities. Also new is the XL Post Box, a fun little box that goes together in 10 seconds and has a slit in the top to tuck a gift card. You will have fun embellishing in your style to create holiday treats for everyone on your list!

https://elizabethr-thecraftyrobin.blogspot.com/2020/10/eileen-hull-new-sizzix-release.html

https://elizabethr-thecraftyrobin.blogspot.com/2020/10/eileen-hull-new-sizzix-release.html

I have a plan for next Spring, New Year, New Shoes!!! So I'm starting saving now in my fabulous box.

https://elizabethr-thecraftyrobin.blogspot.com/2020/10/eileen-hull-new-sizzix-release.html

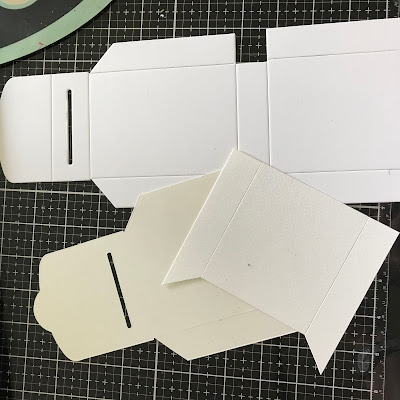
I die cut the box from Sizzix Matt Board, the added some of Eileens Easy Cut Adhesive to the back of a sheet of watercolour card. As the watercolour card was A4 in size it wasn't quite long enough to cover the entire piece, but I didn't need it on the base, so I carefully cut out the two ends missing the base out completely, and thankfully it just fitted.

https://elizabethr-thecraftyrobin.blogspot.com/2020/10/eileen-hull-new-sizzix-release.html

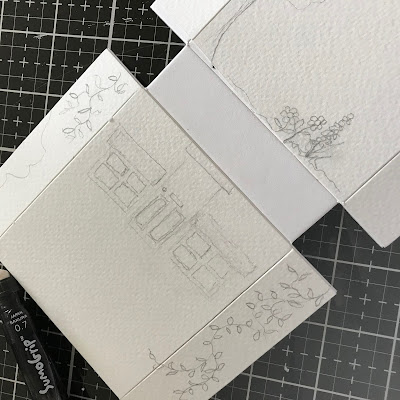
I peeled the backing of and adhered the watercolour card to the Matt Board, and started to sketch out my design. The curve of the flap made me think of a shop frount, you know the ones with the brightly coloured awning above the windows, so that's where my inspiration came from.

https://elizabethr-thecraftyrobin.blogspot.com/2020/10/eileen-hull-new-sizzix-release.html

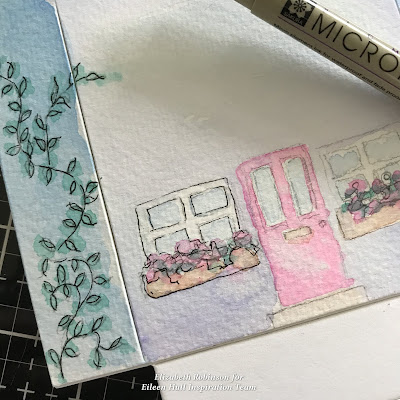
I drew the shop front and took the design over the two sides that would be on show after it would be glued together. I also decorated the back of the box, taking the theme all the way round. I love doodling, and you know I love my watercolours.

https://elizabethr-thecraftyrobin.blogspot.com/2020/10/eileen-hull-new-sizzix-release.html

I really don't need any excuse to get my watercolours out, in fact they live on my desk all the time. I let the paint dry naturally, as I didn't want the heat tool to lift the adhesive sheets. Once everything was totally dry I went in over the top of the sketched design and added more detail using my Micron pen.

https://elizabethr-thecraftyrobin.blogspot.com/2020/10/eileen-hull-new-sizzix-release.html

I had so much fun creating my little shop, I love whimsical design.

https://elizabethr-thecraftyrobin.blogspot.com/2020/10/eileen-hull-new-sizzix-release.html

After gluing the sides together, I added a small magnet under the awning as a closure. So there you have it, my new money box all ready to save for my new shoes.

https://elizabethr-thecraftyrobin.blogspot.com/2020/10/eileen-hull-new-sizzix-release.html

You can check out the "Time for Tea" project on the 21st of this month, where I'll be sharing a  step by step tutorial.

Happy Crafting,

Elizabeth x 

Eileen Hull Fan Page Facebook

Eileen Hull Etsy Shop


 Check out the fabulous new release blog hop

Tonya Trantham

Elizabeth Robinson

Julia Aston

Pam Bray

Maggi Harding

Lisa Hoel

Anna-Karin Evaldsson

Karen Bearse

Susie Bentz

Jenny Marples

Mitsyana Wright

Jennie Atkinson

Anita Houston

Madeline Arendt

Sarah Lizzie Dodd

Sue Eldred

Debbie Bankston

You won’t want to miss the Facebook Live at Eileen Hull Designs at 12:00 noon Eastern time on Thursday, Oct. 1! Join the chat – and a random commenter will WIN a new Teacup Die. 


Wednesday 16 September 2020

Eileen Hull Inspiration Team - The Great Outdoors


https://elizabethr-thecraftyrobin.blogspot.com/2020/09/eileen-hull-inspiration-team-great.html

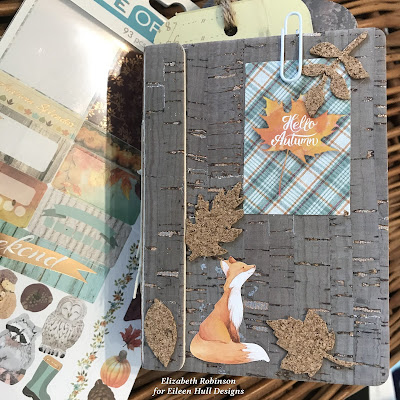
This month over at Eileen Hull Designs  we are featuring "The Great Outdoors".  I love this time of year, the leaves are changing colour and there are always lots of jobs to do in the garden before winter arrives. So I thought why now make a Garden Journal and documents the Great Otdoors!

https://elizabethr-thecraftyrobin.blogspot.com/2020/09/eileen-hull-inspiration-team-great.html

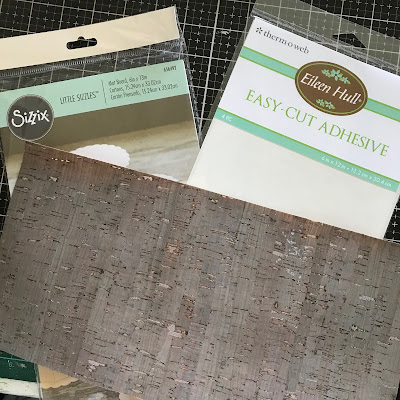
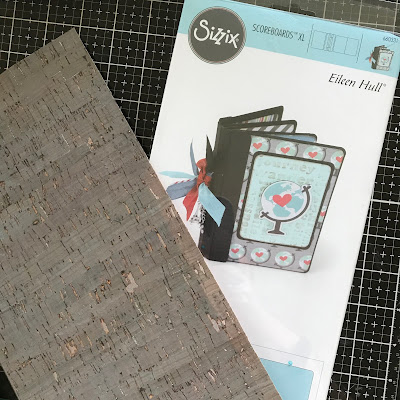
I used Easy Cut Adhesive to adhere the gorgeous Belagio Cork fabric onto my mat Board. I love this fabric it reminds me so much of the bark of a Silver Birch Tree, so perfect for this theme.

https://elizabethr-thecraftyrobin.blogspot.com/2020/09/eileen-hull-inspiration-team-great.html

Once the fabice was in place I finally decided to use the Passport Die for my Journal.

https://elizabethr-thecraftyrobin.blogspot.com/2020/09/eileen-hull-inspiration-team-great.html

I love this die as it has a spine, cover and also page that fit in the completed book. I didn't want to waste anything, so I cut out two cover and two spines, so I have a spine cut out ready to use in another book.

https://elizabethr-thecraftyrobin.blogspot.com/2020/09/eileen-hull-inspiration-team-great.html

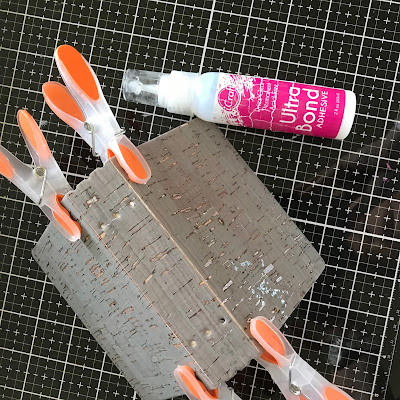
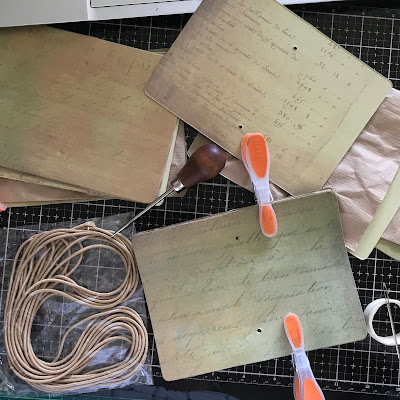
I always use a wet glue to attach my spines to my front and back covers, and I'm loving the iCraft Ultra Bond glue, it;s perfect for the job. As you can see I have all the mod cons to hold my journal together whilst it dries.

https://elizabethr-thecraftyrobin.blogspot.com/2020/09/eileen-hull-inspiration-team-great.html

As you know I hate waste and recycle is my middle name, so it's no surprise to anyone that most of my signatures involve brown paper packaging in them. It makes great textured pages, and it's free.

https://elizabethr-thecraftyrobin.blogspot.com/2020/09/eileen-hull-inspiration-team-great.html

I found this gorgeous paper pad in my stash from Paper Artsy, it's called Chatsworth, I'm not sure if it's still available as I've had it a while.

https://elizabethr-thecraftyrobin.blogspot.com/2020/09/eileen-hull-inspiration-team-great.html

The papers co ordinate beatifully with the brown paper, and I alternated sheets before cutting them with the Passport die. As you can see it even cuts the holes ready for the signatures to be stitched together.

https://elizabethr-thecraftyrobin.blogspot.com/2020/09/eileen-hull-inspiration-team-great.html

I used waxed linen thread to sew the signatures directly into the Journal, tying a knot on the outside of the spine at different heights for each signature. It just add's a little extra detail and it saved my elastic for another journal.

https://elizabethr-thecraftyrobin.blogspot.com/2020/09/eileen-hull-inspiration-team-great.html

A couple of the pages have secret hiding places for tags.

https://elizabethr-thecraftyrobin.blogspot.com/2020/09/eileen-hull-inspiration-team-great.html

So there you have it my finished journal all waiting to be decorated on the inside, using the fun Autumnal stickers from Paper House. Now to find my gardening gloves!

https://elizabethr-thecraftyrobin.blogspot.com/2020/09/eileen-hull-inspiration-team-great.html

Happy Crafting,

Elizabeth x
Eileen Hull Designs

Eileen Hull Fan Page on FaceBook 

Eileen Hull Etsy Shop

Tuesday 18 August 2020

Eileen Hull Inspiration Team - Junk Journal


https://elizabethr-thecraftyrobin.blogspot.com/2020/08/eileen-hull-inspiration-team-junk.html

So excite to be sharing my "Oh Well" junk journal with you today. I think those words sum up exactly how chilled out I am at the moment!

https://elizabethr-thecraftyrobin.blogspot.com/2020/08/eileen-hull-inspiration-team-junk.html

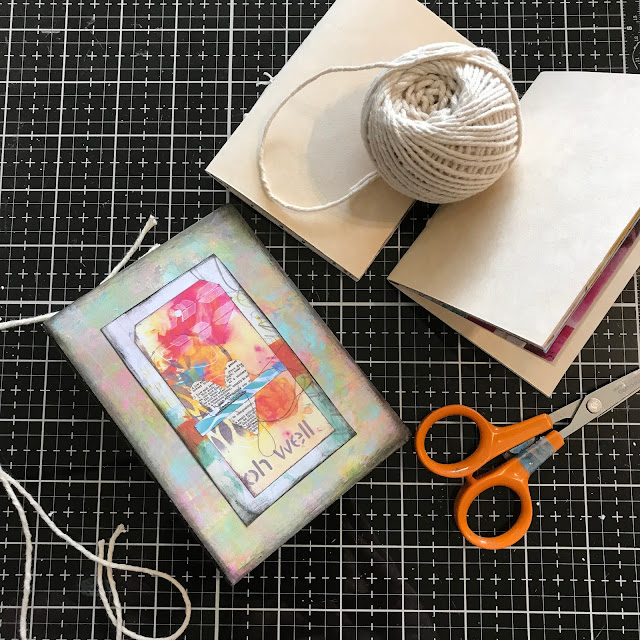
I few weeks ago I was playing with my Gel Press Plate and decided to do a Notebook cover. Love the way it turned out with all my favourite colours smooshed together.

https://elizabethr-thecraftyrobin.blogspot.com/2020/08/eileen-hull-inspiration-team-junk.html

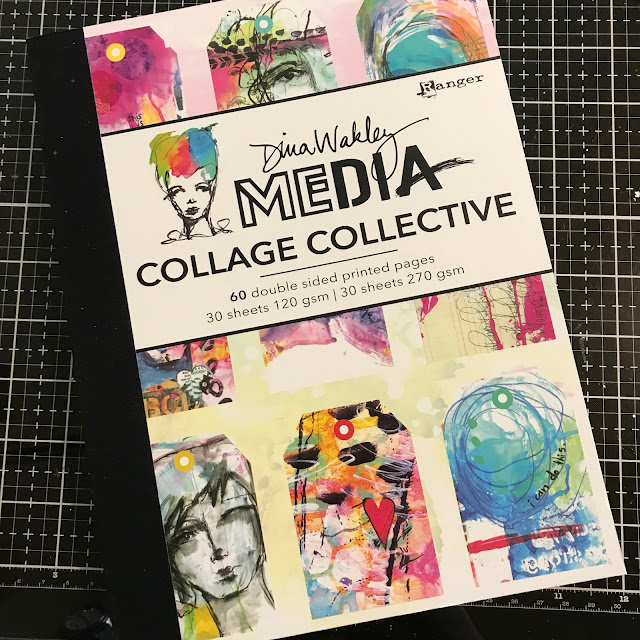
I decided to create inserts using some sheets from Dina Wakley's gorgeous collage papers, along with some papers left over from our wedding stationery.

https://elizabethr-thecraftyrobin.blogspot.com/2020/08/eileen-hull-inspiration-team-junk.html

I cut out one of the designs from the papers and inked around the edges to use as a focal point on the front cover.

I also inked around the edge of the Notebook using Eileen's Ebony ink.

https://elizabethr-thecraftyrobin.blogspot.com/2020/08/eileen-hull-inspiration-team-junk.html

I cut up my chosen sheets of paper roughly, I like to trim them to size once the have been stitched so they are all the same. I alternate the plain papers sandwiching the patterned ones inbetween, that way there are some black pages in case I decide to add writing to them.

https://elizabethr-thecraftyrobin.blogspot.com/2020/08/eileen-hull-inspiration-team-junk.html

I used good old fashioned clothes pegs to hold the signatures in place whilst I pierced holes in the spines and did a basic phamphlet stitch using waxed linen thread to hold them together. Then I trimmed them down to 3 1/4 by 4 1/2 folded size using a metal edged ruler and craft knife.

https://elizabethr-thecraftyrobin.blogspot.com/2020/08/eileen-hull-inspiration-team-junk.html

Inside the cover I used one of Dina's sentiments, very apt I thought!

https://elizabethr-thecraftyrobin.blogspot.com/2020/08/eileen-hull-inspiration-team-junk.html
 
And to keep the organic arty feel to the signatures I tied them into the spine using soft cotton string.

https://elizabethr-thecraftyrobin.blogspot.com/2020/08/eileen-hull-inspiration-team-junk.html


Happy Crafting

Elizabeth x


Eileen's Fan Group on Facebook

Eileen Hull Etsy Shop 

Eileen Hull Designs

Saturday 8 August 2020

Imagination Crafts USB 2 - Enchanted


https://elizabethr-thecraftyrobin.blogspot.com/2020/08/imagination-crafts-usb-2-enchanted.html

Print off two sheets of the Enchanted rice paper. Using a paint brush wet around the edge of one sheet, and gently tear it away. Adhere to the centre of the canvas.

https://elizabethr-thecraftyrobin.blogspot.com/2020/08/imagination-crafts-usb-2-enchanted.html

Dry brush using white gesso and dry. Dilute some of the purple paint to create a wash, and add colour to the butterflies and foliage.

https://elizabethr-thecraftyrobin.blogspot.com/2020/08/imagination-crafts-usb-2-enchanted.html

I used a pencil to dry in the Butterfly wings to go over the edge of the rice paper. Splatter the remains of the dilute purple all over the canvas.

https://elizabethr-thecraftyrobin.blogspot.com/2020/08/imagination-crafts-usb-2-enchanted.html

Next add shading around the outer edge of the rice paper to create shadow and an aged effect. Blend this outwards for a vintage feel. Repeat until you are happy with the depth of shade.

https://elizabethr-thecraftyrobin.blogspot.com/2020/08/imagination-crafts-usb-2-enchanted.html

Dilute some gold wax and add to the Butterfly wings and cobweb.

https://elizabethr-thecraftyrobin.blogspot.com/2020/08/imagination-crafts-usb-2-enchanted.html

Add gold wax splatters to the canvas to add subtle fairy lights.

https://elizabethr-thecraftyrobin.blogspot.com/2020/08/imagination-crafts-usb-2-enchanted.html

Adhere the other three Butterflies from the second rice paper to a piece of waste plastic packaging using the fabric decoupage glue. Add a layer of diluted purple paint to the inner wings and let dry.

https://elizabethr-thecraftyrobin.blogspot.com/2020/08/imagination-crafts-usb-2-enchanted.html

Once dry carefully cut out the wings and add a little gold wax around the edges before adhering them with foam pads to the canvas.

https://elizabethr-thecraftyrobin.blogspot.com/2020/08/imagination-crafts-usb-2-enchanted.html


Happy Crafting.
Elizabeth x