Monday, 26 November 2018

Compose Your Life Journal Cover - Part Two


So now the outer cover of the journal is finished, it's time to move onto the inside. First of all I chose some green elastic that was a close colour match to the cover. I use a 3mm diameter elastic, but there are lots of other things you can use, like twine or ribbon.


I undid the top of the Golden Lime Glimmer Mist and flicked the gorgeous mist on to the cover, working quickly I used a dry flat paintbrush to drag the colour out, I love the pattern this creates.


This is one of the new shades of Glimmer Mist, it's so pretty and a perfect match for this paper collection.


Then onto choosing the papers for the signatures. I chose three of the patterned card stock from the 8" paper pack, and then a selection of co-ordination papers, along with one more sheet of patterned paper from the pack.


Working with one signature at a time, I folded all of the papers, along with the patterned card, which was placed to become the outer cover. I trimmed everything down to a size of 8" wide by 7 3/4" high. And made sure all the pages were level.


Next I opened up the signature, and I like to use a couple of household pegs to keep the pages in place, whilst I poke the holes through and sew the papers together. It makes things so much easier if the pages aren't moving around. I use a waxed linen thread as it;s nice and strong, and once it's tied it won't come undone.


These are just going to be little note books, so I haven't decorated the inside of them, as I'll probably use them for making list's of jobs that need doing. I love making lists, and crossing off the jobs as they are done, it's so satisfying.


So my three beautiful signatures just slip into the journal, with the elastic holding them in place. For a little decoration on the inner cover, and of course it's practical to have a place to slip in some gorgeous paper clip page markers, all made from the flowers that were cut out from the 12x12" sheet. I used one of Eileen Hull's very clever dies, the Credit Card Die, it creates a journaling card, and also comes with a another little die that sits inside, to cut out the scalloped slits to pop your extras in.


I added a sentiment cut from one of the sheets in the paper collection, and now my journal is ready to be used.


Happy Crafting.
Elizabeth x

Thursday, 22 November 2018

Winter Wishes Blog Hop with Emerald Creek


Today Emerald Creek Craft Supplies and Eileen Hull are collaborating to bring you the Winter Wishes Blog Hop featuring lots of holiday inspiration!


Warm thoughts are unfolding, 

as we begin to enter a festive time of year. Eileen, Kim and The Teams have created a fun blog hop challenge to kick of the American Thanksgiving and Winter festivities.
To play along all you need to do is follow along and comment on every blog. If you play along and link up your own creation using Eileen and Emerald Creek products, you will get 2 bonus entries for the draw. Contest Closes on Sunday November 25th, with the Winner announced Cyber Monday!
Prize includes an Eileen Hull Wrap Journal Die and a $50.00 gift certificate to the Emerald Creek Shop.

Kim Evans


Using Eileen's range of Clearsnap inks, I stamped the Holly all around the edge of a 5 3/4" square piece of card, in Hydrangea.


Then I inked around the edge to create a frame using Uniform.


I stamped out the gorgeous Polar Bear onto a piece of white card that was 5"x2 1/2" using Onyx Black Versafine, and then tore strips of card to create the snowy scene, and bring the picture to a 5" square. Using a paper distresser, I distressed all the edges, with the exception of the snow layers that would be hidden.


I inked around the edges of the snow with the same two shades of ink, and adhered all the pieces to the Holly background.


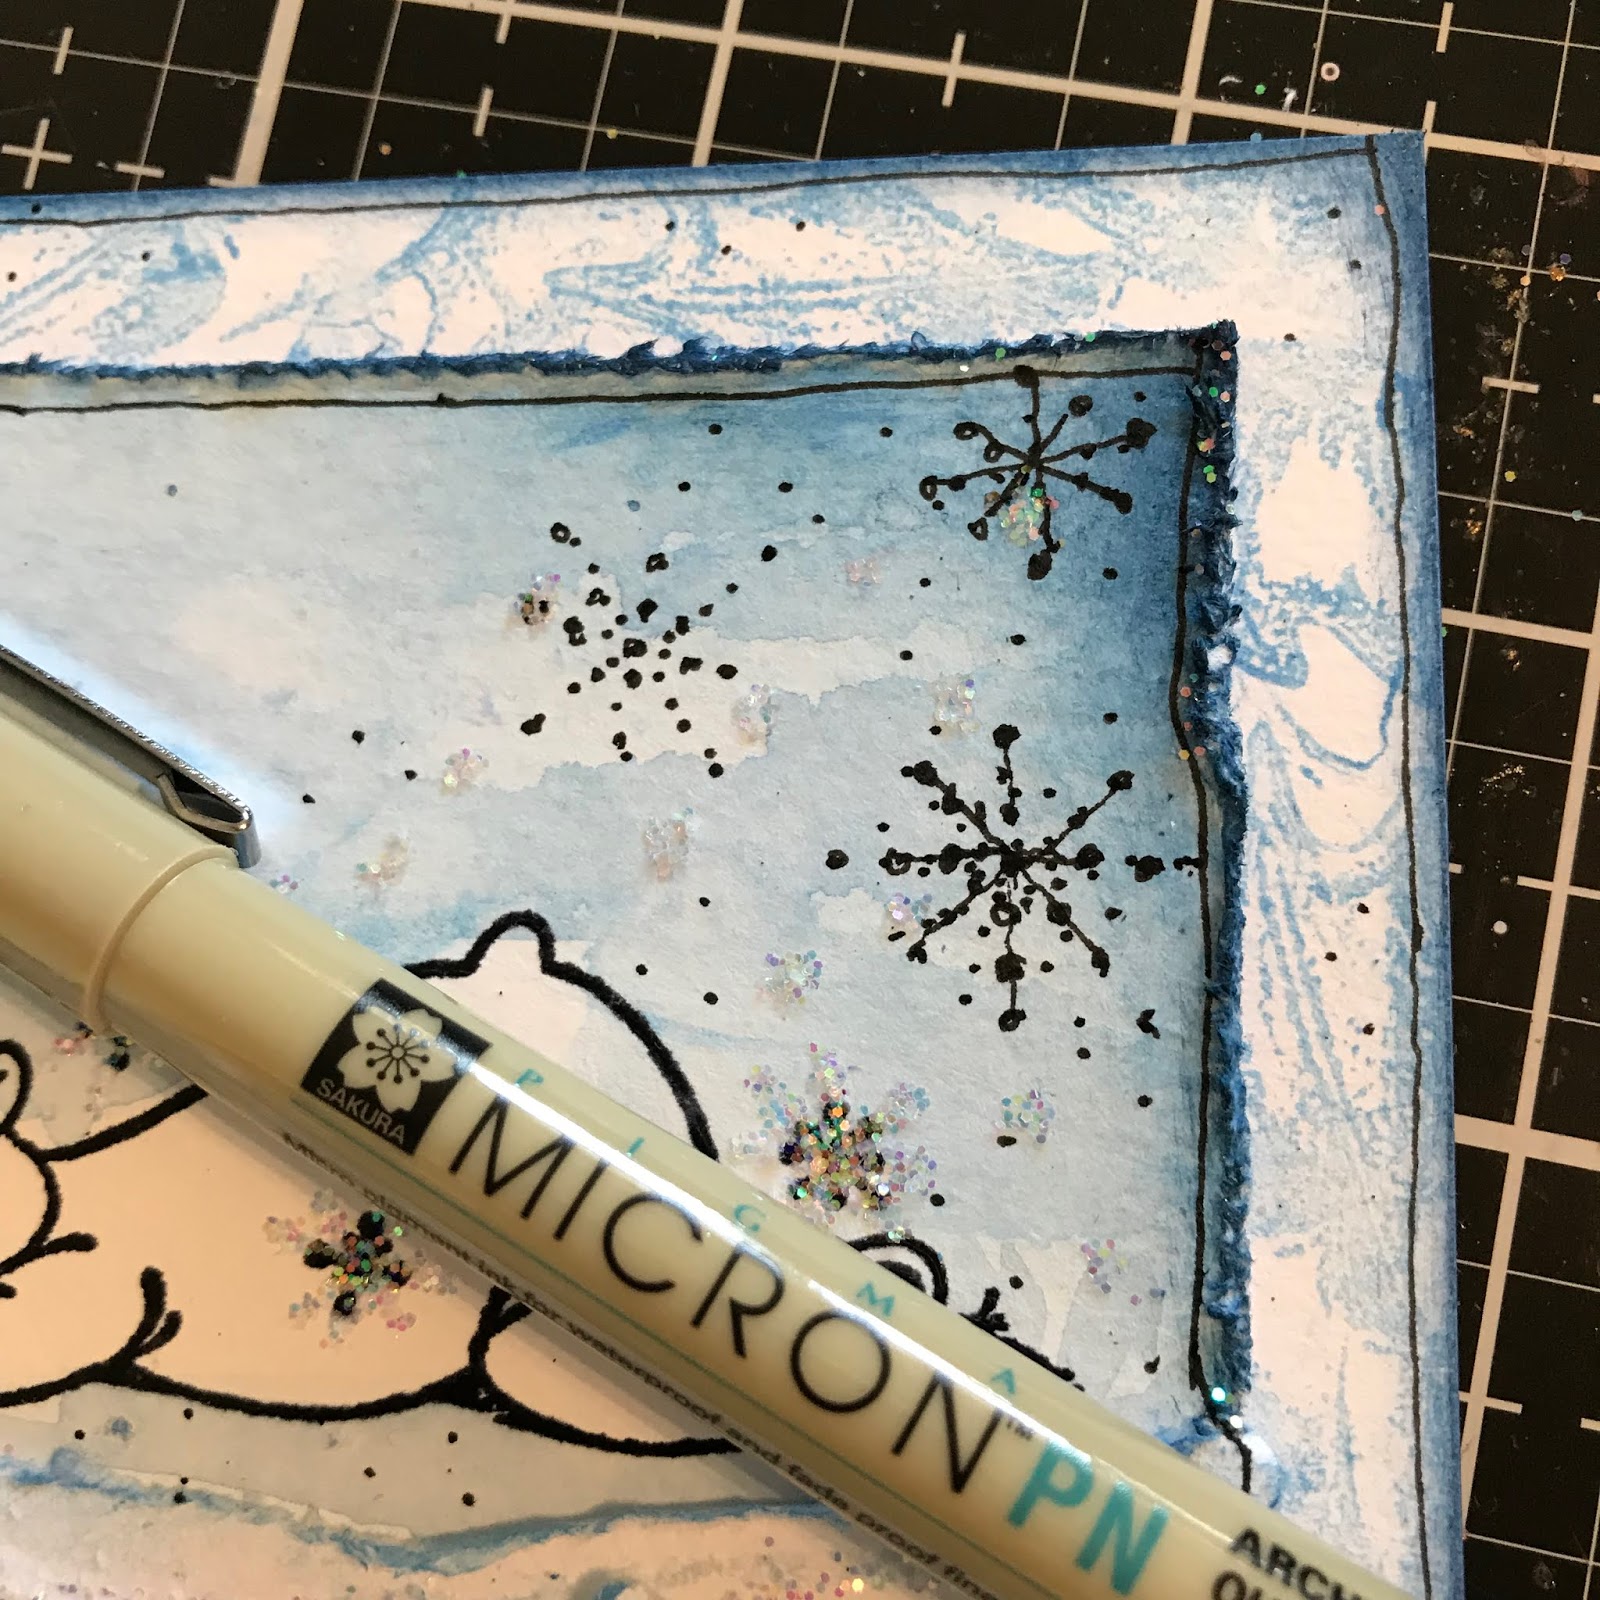
I added a little of both shades of ink to my craft mat, added a little water, and painted in the sky. I took a piece of kitchen roll and dabbed the wet ink to remove some, and create snow filled clouds.


I added glistening snow with extra fine iridescent glitter and my Quickie Glue Pen. I also dotted snow around the sky and snowflakes as well.


Then with my Black Micron PN pen I added a few extra snow flakes, dots and a squiggly border around both layers.


I stamped out the Warmest Wishes sentiment onto a scrap piece of card, cut it out, and inked around the edges with Hydrangea ink.


To finish off I added the layers onto a 6" square white card blank.

This was such a fun project to do, and a great way of using up a few of those scrap pieces of card.

Thanks so much for visiting here,  don't forget to leave me a comment and visit the other blogs in the Hop, and leave them a comment to be in with a chance of winning a prize.

Good Luck
Elizabeth x

Wednesday, 21 November 2018

Compose Your Life Journal Cover - Part One


The Autumn weather here in the UK has changed into Winter over the last few days, the winds are bitter. So it's a perfect time to catch up with some crafting, and feed my addiction of creating journals.


I die cut Eileen Hulls Journal from mount board and adhered the two pieces together, ready to work on. I adore these papers from Aga Baraniak, they are so beautiful, and could be used for any time of the year. I chose four of the Tattered Angels Glimmer Mists to co-ordinate with them. Golden Lime, Sterling, Driftwood and Festival.


I sat in front of the fire, with hot tea and set about cutting all the gorgeous flowers and leaves from the Red Flower Pieces 12" paper. It didn't take long at all, and I now have all the embellishments ready to use with my journal.


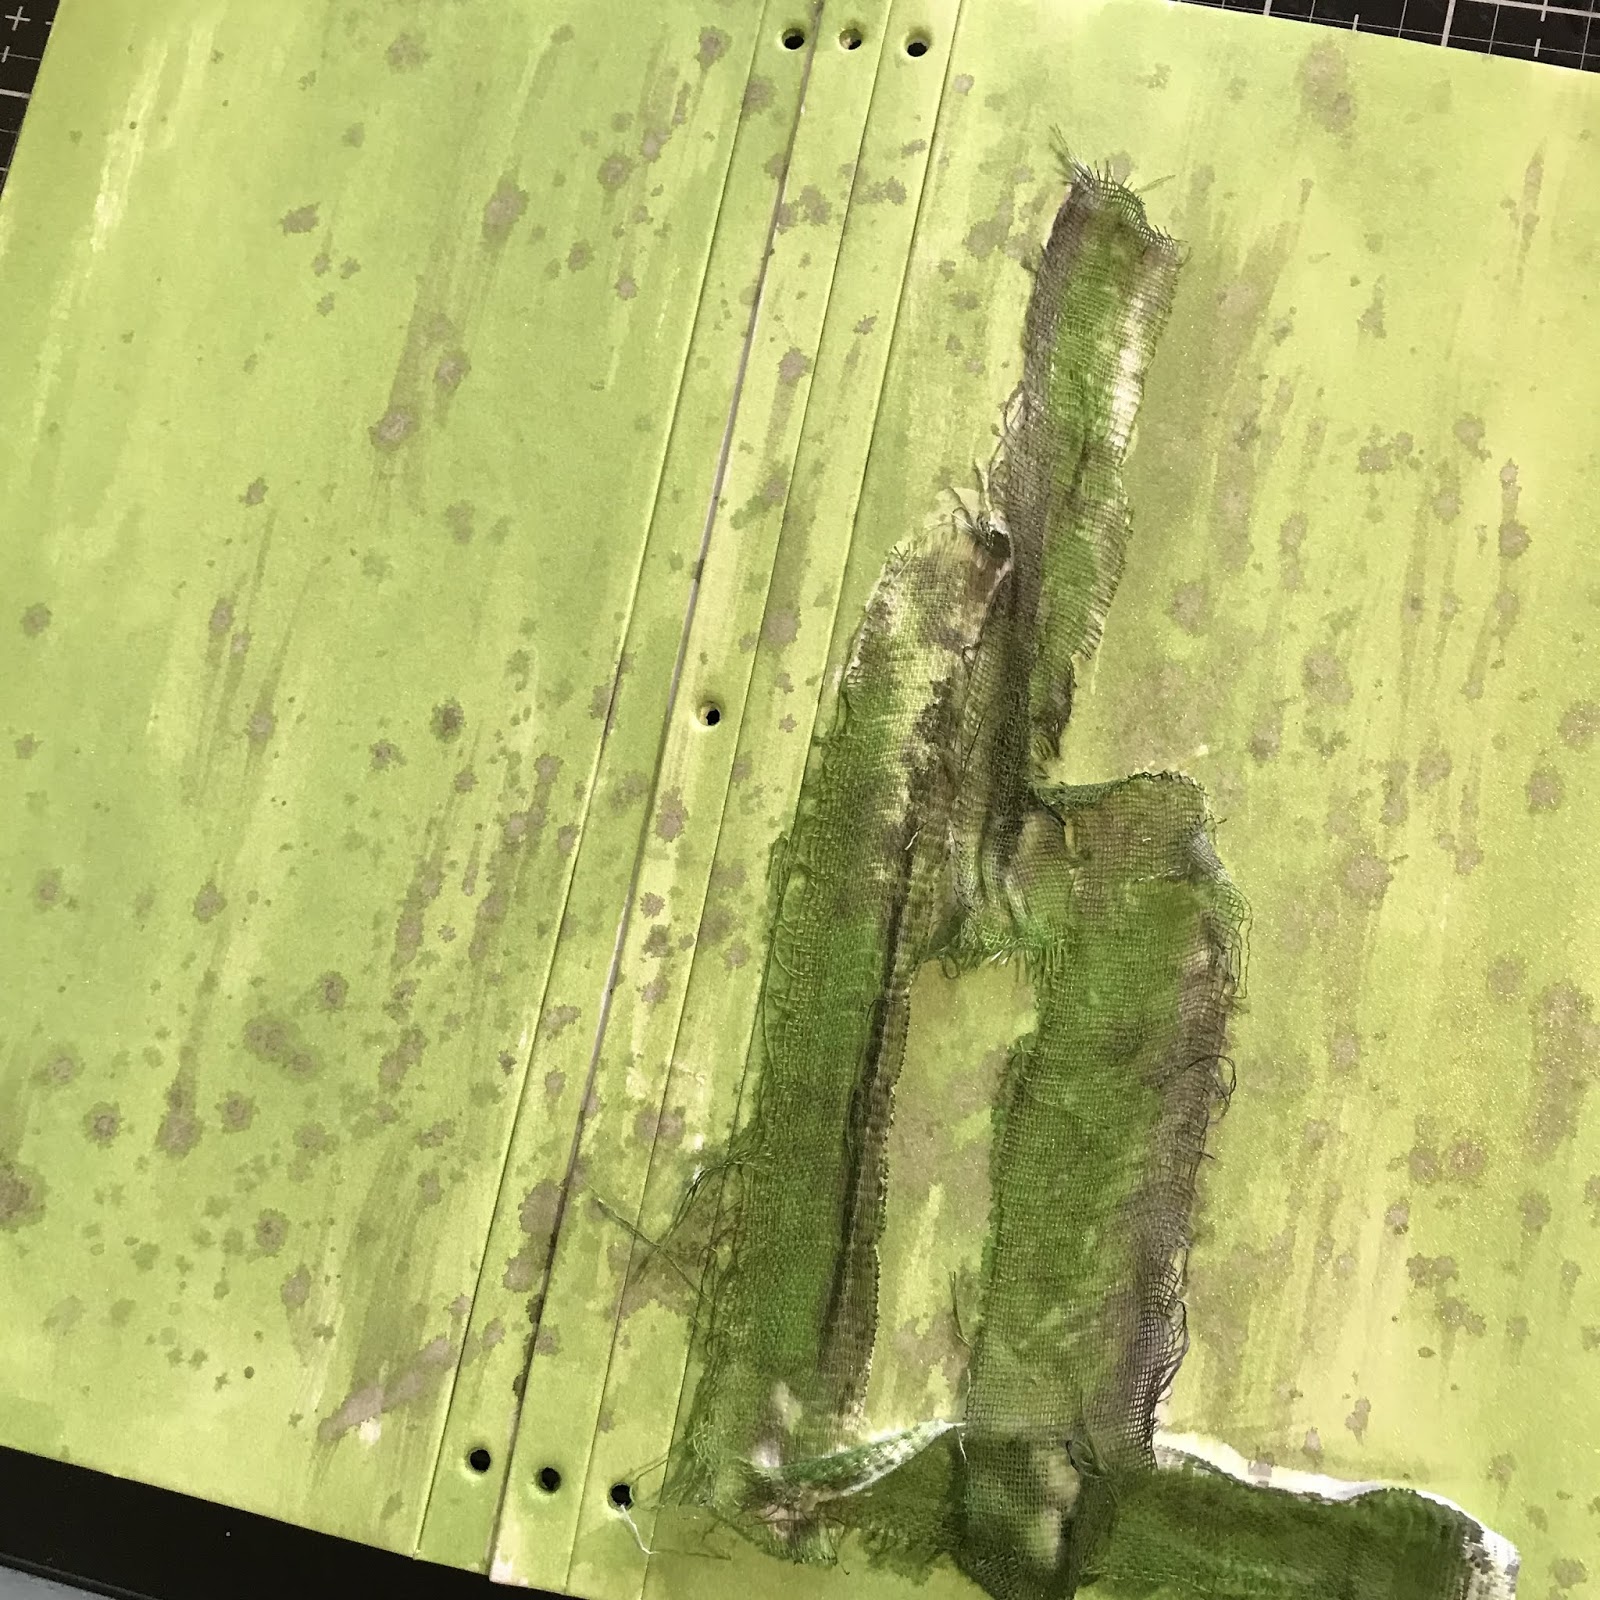
To add texture onto the cover of the journal, I glued some strips of muslin, pulling at the loose threads to create even more texture.


I painted the entire cover with Golden Lime Glimmer Mist and before it was dry, splattered Sterling Glimmer Mist into it. It started to blend into the green, and with a little help from a clean paintbrush, I worked some of the larger splatters in a little more, then cleaned my brush along the muslin, as I wanted to create some shadows behind where the flowers would sit.


I love doing this technique, and then knocking the colour back using white gesso. This gives a beautiful soft, shabby feel to the project.


I decided the cover needed even more threads adding for texture, and to create a nest for the flowers to sit on. As you can see my roll of thread started life as white, but is now many shades of blues, greens and a hint of gold :)


I swirled the threads round, making sure that sections would still be seen after the flowers and leaves were added.


All that was left then, was to arrange the flowers and leaves, following the lines of the calico for a guide.


I finished the cover by adding a sentiment cut out from the Compose Your Life 8x8 paper pad, cut out and inked around the edge with a little Black Soot Distress Ink. And to finish the cover just a few black sequins, you know I just can't resist them.


So there you have the completed cover, I love how rustic but pretty it turned out. I'm off to work on the inside now, and add some more of Aga's beautiful papers to my pages.

Happy Crafting.
Elizabeth x

Tuesday, 13 November 2018

Autumn Holidays Journal


I absolutely love the Autumn months, chilly winds and golden leaves falling from the tree's. It's a perfect time of year for getting wrapped up and getting out for long walks before the snow arrives.


I've created a masterboard on water colour card using some of Eileen's range of the Color Box Blend inks, the colours are stunning. I used Golden, Sunshine, Nutmeg, Leaf, Frog and Stop. I took the ink direct to paper, then spritzed it to make the ink flow and blend even more.


Once my water colour card was totally dry, it was ready to be die cut using the gorgeous leaves from the Journaling Cards, Flowers and Leaves die set. My piece of card was roughly 6" square, so you can see just how many leaves I managed to cut from it, I even have spares ready to add onto the inserts.


I will keep the Waste to use on a project as well. it's just too gorgeous to bin!


I chose three shades to add splatters onto another piece of water colour card, starting with the palest, and building up to the Nutmeg Brown shade. I used the shades Golden, Stop and Nutmeg.


Once it was dry I used the journal card to die cut it to size, and also die cut the word "Wander" from the Journaling Cards die set in black.


Then after cutting out my wrapped Journal in mount board, I decided to add colour with the same three inks, again by splattering them.


I made sure the cover was dry and added some shading around the edge using the Nutmeg Brown shade. I did the same with the journaling card to create a frame and make it stand out from the journal cover.


I always use every last scrap of my sticky pads, the leftovers a perfect for adding bigger layers.


Now to build up the front cover first with the word.


And then arranging the leaves, so they tumble down the cover.


I played around with the design before gluing them down.


Happy Crafting.
Elizabeth x

Friday, 2 November 2018

Craft Stamper Magazine Challenge November 2018


Welcome to November and the start of our new challenge over at the Craft Stamper Magazine Blog 

I've been playing with Distress Oxide backgrounds, Imagination Crafts stamps and my Sakura Gelly Roll pens to create quick and easy Fireworks over the Paris skyline.


We would love you to join in with the challenge and share your projects that have stamping on them with us.

As always we have a fabulous prize up for grabs, just check out this amazing bundle, wish I could enter.

So hop over to the challenge blog to check out how to enter, follow the instructions and join in the fun! There's also the chance to be featured in the magazine as well, how cool is that!

Happy Crafting.
Elizabeth x

Thursday, 1 November 2018

Imagination Crafts One Day Special Launching Friday 2nd November


I've loved working with all the new goodies Sue will be launching on Hochanda as a One Day Special on Friday 2nd November. There are stunning Rice Papers, gorgeous new Magicuts and Stencils all with a stunning Paris theme.


Happy Crafting
Elizabeth x