Showing posts with label Jane Davenport. Show all posts

Friday, 8 November 2019

Craft Stamper Magazine Challenge November 2019 Inspiration


Keeping my stamping simple today as I think the beautiful Poppies from Jane Davenport speak for themselves. I gave them a quick wash of colour from my Mermaid Markers before a little doodling, and a Chat Word from Tim Holtz.

We have a fabulous prize up for grabs over at the Craft Stamper Magazine blog, along with the chance to be featured in the magazine it's self.

To be in with a chance of winning, all you have to do is share your stamping artwork with us. You will find all the information you need for entering over at the blog (via the link above), along with lots more inspiration from the rest of the team.


So check out the blog and I hope to see you joining in with the fun.
Happy Crafting.
Elizabeth x

Friday, 1 February 2019

Craft Stamper Magazine February Challenge


It's February and time for a new challenge over at the Craft Stamper Magazine Blog where we would love you to share the projects you've made using real stamping on them.

As always we have a fabulous prize up for grabs along with the change of being featured in the magazine it's self, how cool is that!

So check out this months prize.....


Hop over to the blog, via the link above to check out the guidelines, and get entering to be in with a chance to win.

Happy crafting.
Elizabeth xxx

Wednesday, 21 February 2018

My New Favourite Die......Eileen Hull's Wrap Around Journal Part Two


So now we move on to the inside where there's lots of room for four signatures.


 First I started by creating a master board using Amsterdam acrylic paints onto copy paper. These would form the base of the signature covers.


 Building the colours up and blending them together with my fingers, I'm a hands on crafter.


Once I was happy with the painted background and it was totally dry, I used one of the Mandala stamps from the Jane Davenport with Lilac StazOn ink to create a random pattern, before cutting the pages out using Eileen's Passport Book Die. The pages on that die are the perfect size to fit the Wrap Around Journal, and as this is going to be a notebook, I can die cut several sheets of copier paper at a time.


I decided to knock the colours back a little, as they were very vibrant compared to the journal cover. So a quick dry brush with white gesso created a softer, muted tone to the signature covers.


 To finish off the covers I added some doodles using one of the new size White Gelly Roll pens, love this size 10 one, as it's larger than the standard size 08 one we all know and love. They have also brought out a finer one as well size 05


I found some pretty washi tape with feathers on and added pieces onto the covers for decoration, and also to strengthen the spines of the inside of the covers.


 Then after a sewing the signatures with a waxed linen thread, they were ready to be slipped inside the Wrap Around Journal.


All ready to take notes and add lists in to.

You can check out Part One HERE where you will find details of the Wrap Around Journal cover.

Hope you've enjoyed seeing the process, happy crafting.
Elizabeth x


http://www.eileenhull.com/
https://www.etsy.com/uk/shop/EileenHull?ref=l2-shopheader-name


Friday, 16 February 2018

My New Favourite Die......Eileen Hull's Wrap Around Journal Part One


I feel so naughty sharing this, but.............my favourite die at the moment is the new Wrap Journal Die from Eileen's Book Club Sizzix Collection Chapter Two. This won't be launching until Summer, but boy will it be worth the wait!! Imagine creating Wrap Journals with Mat Board, Leather and all things that a Bigz Die can cut.


My journal was cut from a piece of a piece of Sizzix Matboard and covered with a piece of the gorgeous Jane Davenport Deli paper, these sheets are huge as you can see from the picture above.


I used a multi medium to adhere the paper to the board, and as it dried the wrinkles appeared, o flip....


So not one to be put off by a few wrinkles here and there I lightly sanded everything back, and neatened up the edges and crease lines. Now we are good to go!


This paper is a great way of achieving a mixed media look if you are new to the style, or just want a quick way of covering a journal.

After brushing any loose dust away from the sanding, I gave the cover a light dry brushing of white gesso. This added to the dreamy colours of the papers, and hid any marks from the sanding :)


Then inspired by Eileen's Valentine Shaker Tutorial (you can find the first half HERE) I embraced my wrinkles with a Limited Edition shade Treasure Gold which has no name, but it's a rich deep Kingfisher shade. I added this in a randomly with my finger, then using a cotton wool bud added some into the scored fold lines, to loose the brightness of the white.


I'd forgotten how gorgeous using a coloured wax on a project is, and got slightly carried away......I love that shade of gold, especially over the kingfisher.


So a nice easy mixed media cover in how many steps, paper, gesso, and two different waxes......yes four steps after adhering the paper to the board!


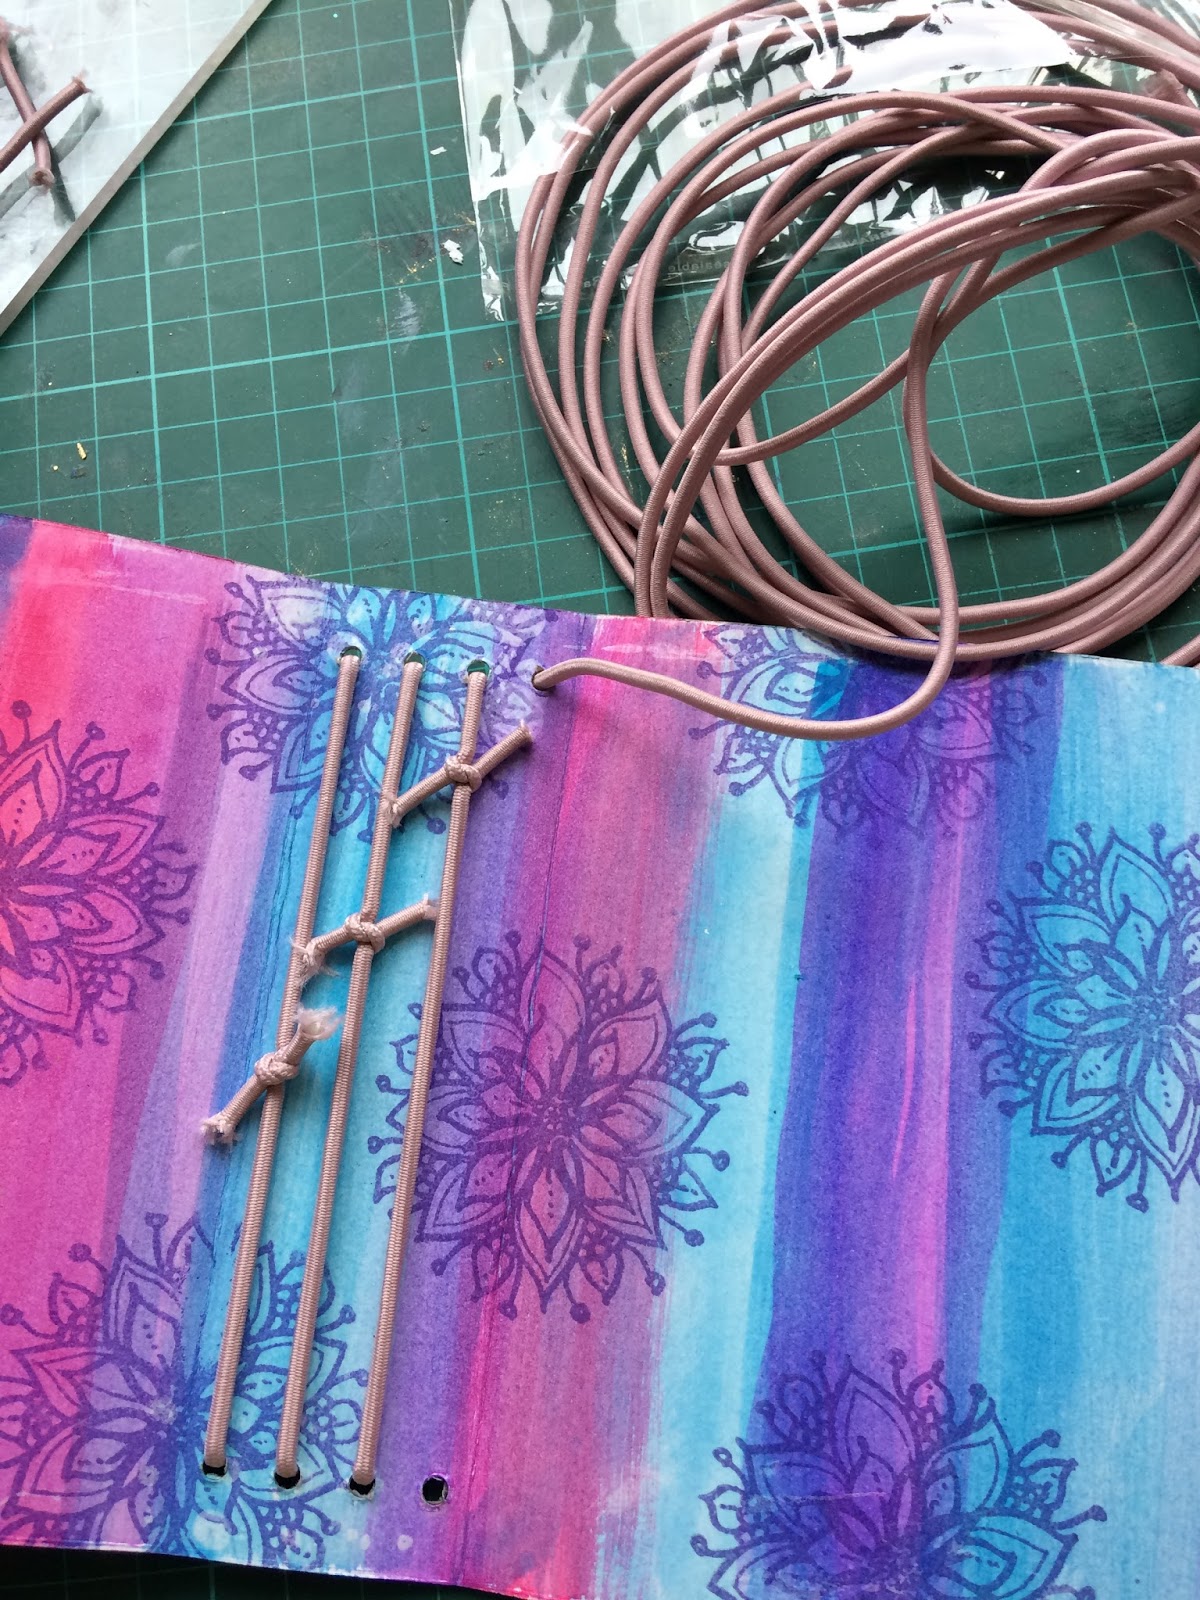
So then it was time to flip the cover over and decorate the inside. It couldn't be simpler than grabbing watercolours and creating random stripes that overlap each other, I chose three colours purple, pink and blue from my Koi water colour box.


Then for extra decoration used the smaller Mandala stamp from Jane Davenport, in a Vibrant Violet StazOn ink. And yes don't worry I did clean my stamp afterwards.


I used a blush pink elastic fastened is a very simple way ready to add my signatures. I love the shade of the elastic and the straight lines on the spine of the journal, and it matched the cover perfectly.


It took me longer to decide what type of fastener I wanted, than it did to make the journal. There are so many ways to create closures.


In the end I opted for a magnetic closure, which was easy to attach and hide with the help of a little worker Bee. Well I am Mancunian after all.

So there's the cover all ready and waiting for the signatures, I'll be sharing those in a new post next week after I get home from Creativation UK.

Don't forget to check out the rest of the team's favourite dies over at the Eileen Hull Fan Club on Facebook. You will find bucket loads of links, inspiration, hints and tips, and you might just spot a fabulous giveaway from time to time!


Happy Crafting
Elizabeth x

http://www.eileenhull.com/
https://www.etsy.com/uk/shop/EileenHull?ref=l2-shopheader-name