Showing posts with label Imagination Craft. Show all posts

Saturday, 8 August 2020

Imagination Crafts USB 2 - Destiny


https://elizabethr-thecraftyrobin.blogspot.com

Print off two copies of the Hare Rice Paper. Using a damp paintbrush  take the Hare out completely and split the paper into two pieces. Adhere to opposite corners.

https://elizabethr-thecraftyrobin.blogspot.com

Start building up the colour by first stippling orange acrylic paint.

https://elizabethr-thecraftyrobin.blogspot.com

Stipple the next layer using Sedona, leaving a little orange peeping through.

https://elizabethr-thecraftyrobin.blogspot.com

Build up the layers using light brown, and if needed a little more of the other two colours until you are happy with your background.

https://elizabethr-thecraftyrobin.blogspot.com

Stencil the tree branches, script and the moon using a mix of light brown paint with a little black gesso added to darken it up.

https://elizabethr-thecraftyrobin.blogspot.com

Create splatters with a mix of white gesso and orange paint.

https://elizabethr-thecraftyrobin.blogspot.com

Making sure the light orange splatters are dry, go back over and add splatters of diluted gold wax to create a sky full of stars.

https://elizabethr-thecraftyrobin.blogspot.com

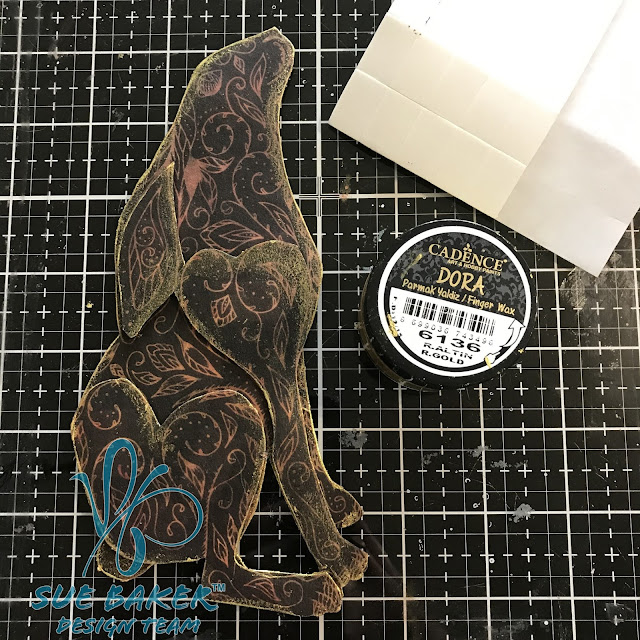
Adhere two Hare images to a scrap of acrylic packaging using the fabric decoupage glue, and leave to dry.

https://elizabethr-thecraftyrobin.blogspot.com

Once dry carefully cut out and decoupage the layers. Add a fine layer of gold wax to the edges to create a more defined edge.

https://elizabethr-thecraftyrobin.blogspot.com

Adhere the Hare to the canvas using raised foam pads.

https://elizabethr-thecraftyrobin.blogspot.com

Happy Crafting
Elizabeth x


Thursday, 9 July 2020

Imagination Crafts New Releases


Scrape layers of the Green and Taffy paint down the canvas using a palette knife.


Dry and repeat the process using white gesso, to knock back the strong green colour, and add an etherial look to the canvas.


Freehand paint in some long grasses and stems, so you can extend the height of the flowers.


Place the stencil over the top of the stems, and just use the flower heads, randomly moving to create organic flower heads.


Keep adding flowers until you are happy with your canvas. Dry and add white highlights using a No10 white gelly roll pen.


This technique will give you a very sketchy organic look to your canvas.


Finish by using a blossom stencil across the bottom of the canvas, stippling the flowers in white/blue.

Dry and dry brush using white gesso to knock them back into the rest of the foliage.


Using the same technique as the canvas base, scrape down the Platinum randomly down the canvas to add a sheen.


Finish by adding the gold wax around the edge of the canvas to create a golden frame to your work.


To finish off go around the main flowers and grasses and add shading using a purple polycolor pencil.


Happy Crafting
Elizabeth x

Imagination Craft New Releases


Start by marking out your canvas, to create a frame ready for the stencilling.


Paint the frame with gold paint, being careful to paint the sides of the canvas as well.  This leaves three white spaces to add your stencilling to.


Play around with the stencil until you have the desired placement and stipple paint through.


When completely dry finish by adding white highlights with a No10 white gelly roll pen, and a scribbly border using a black micron pen.


Happy Crafting
Elizabeth x

Imagination Crafts New Releases


Start by adding three blobs of blue, cream and green onto your canvas.


Blend them together to create an ombre.


Using white gesso create fluffy white clouds in the sky.


Then using a mix of the green and the whie gesso, create a field grasses for your stencilled roes to sit on.


Use a black paint pen to add birds and also a few random dots inbetween the grasses to create an illusion of insects flying around.

Finish by adding white highlights with a whie paint pen.


Happy Crafting
Elizabeth x

Friday, 3 May 2019

Craft Stamper Magazine May 2019 Challenge


It's the start of the new challenge over at the Craft Stamper Magazine Blog

Where this month we have a fabulous prize up for grabs as well as the chance to be featured in the magazine it's self.


All you need to do to be in with a chance is go over (via the link) to check out the submission instructions, then share your artwork created using stamping on them with us. While you are there check out the fabulous artwork created by the team to inspire you to join in the fun.

Happy Crafting
Elizabeth x


Monday, 4 February 2019

Eileen Hull's Treasure Box and Stacking Drawer


I really enjoyed decorating the top of this Treasure Box, it's been ages since I've done any mixed media and I just love how all the textures work together, along with the clean fresh papers from DCWV. I've layered lots of Baked Textures from Emerald Creek, along with some of their gorgeous little semi precious gem stones.


The Palms and Ferns paper stack from DCWV is just gorgeous, and with so many co-ordinating papers to choose from just perfect for decorating the Treasure Box and Stacking Drawers, which are hidden away inside.


I cut the hinges and handle from gold card to co-ordinate with the beautiful palm leaf papers.


I used masking tape to create a hinge, being careful to make sure that the edges are lined up before adding three pieces on each side, that overlap each other. Once I'm happy they are adhered, I add the patterned papers over the top. I also glue the Stacking Drawers into place leaving a slight gap around the front edges, so that when I add the paper strips I can just about tuck the edge of the paper underneath the sides of the drawers, keeping the edges neat and tidy.


Happy Crafting.
Elizabeth x

Eileen Hull Designs
Eileen Hull Etsy Shop
Eileen Hull Fan Club on Facebook

Friday, 2 November 2018

Craft Stamper Magazine Challenge November 2018


Welcome to November and the start of our new challenge over at the Craft Stamper Magazine Blog 

I've been playing with Distress Oxide backgrounds, Imagination Crafts stamps and my Sakura Gelly Roll pens to create quick and easy Fireworks over the Paris skyline.


We would love you to join in with the challenge and share your projects that have stamping on them with us.

As always we have a fabulous prize up for grabs, just check out this amazing bundle, wish I could enter.

So hop over to the challenge blog to check out how to enter, follow the instructions and join in the fun! There's also the chance to be featured in the magazine as well, how cool is that!

Happy Crafting.
Elizabeth x

Thursday, 1 November 2018

Imagination Crafts One Day Special Launching Friday 2nd November


I've loved working with all the new goodies Sue will be launching on Hochanda as a One Day Special on Friday 2nd November. There are stunning Rice Papers, gorgeous new Magicuts and Stencils all with a stunning Paris theme.


Happy Crafting
Elizabeth x

Saturday, 8 September 2018

Samples from Imagination Crafts One Day Special Shows


I suddenly realised that I hadn't shared any photo's of the samples I made for Imagination Crafts One Day Special last week, how rude is that!. Really love the new stencils that were launched, they are fabulous images for mixed media projects.

Happy Crafting
Elizabeth x