Showing posts with label Cadence. Show all posts

Saturday, 8 August 2020

Imagination Crafts USB 2 - Enchanted


https://elizabethr-thecraftyrobin.blogspot.com/2020/08/imagination-crafts-usb-2-enchanted.html

Print off two sheets of the Enchanted rice paper. Using a paint brush wet around the edge of one sheet, and gently tear it away. Adhere to the centre of the canvas.

https://elizabethr-thecraftyrobin.blogspot.com/2020/08/imagination-crafts-usb-2-enchanted.html

Dry brush using white gesso and dry. Dilute some of the purple paint to create a wash, and add colour to the butterflies and foliage.

https://elizabethr-thecraftyrobin.blogspot.com/2020/08/imagination-crafts-usb-2-enchanted.html

I used a pencil to dry in the Butterfly wings to go over the edge of the rice paper. Splatter the remains of the dilute purple all over the canvas.

https://elizabethr-thecraftyrobin.blogspot.com/2020/08/imagination-crafts-usb-2-enchanted.html

Next add shading around the outer edge of the rice paper to create shadow and an aged effect. Blend this outwards for a vintage feel. Repeat until you are happy with the depth of shade.

https://elizabethr-thecraftyrobin.blogspot.com/2020/08/imagination-crafts-usb-2-enchanted.html

Dilute some gold wax and add to the Butterfly wings and cobweb.

https://elizabethr-thecraftyrobin.blogspot.com/2020/08/imagination-crafts-usb-2-enchanted.html

Add gold wax splatters to the canvas to add subtle fairy lights.

https://elizabethr-thecraftyrobin.blogspot.com/2020/08/imagination-crafts-usb-2-enchanted.html

Adhere the other three Butterflies from the second rice paper to a piece of waste plastic packaging using the fabric decoupage glue. Add a layer of diluted purple paint to the inner wings and let dry.

https://elizabethr-thecraftyrobin.blogspot.com/2020/08/imagination-crafts-usb-2-enchanted.html

Once dry carefully cut out the wings and add a little gold wax around the edges before adhering them with foam pads to the canvas.

https://elizabethr-thecraftyrobin.blogspot.com/2020/08/imagination-crafts-usb-2-enchanted.html


Happy Crafting.
Elizabeth x

Imagination Crafts USB 2 - Destiny


https://elizabethr-thecraftyrobin.blogspot.com

Print off two copies of the Hare Rice Paper. Using a damp paintbrush  take the Hare out completely and split the paper into two pieces. Adhere to opposite corners.

https://elizabethr-thecraftyrobin.blogspot.com

Start building up the colour by first stippling orange acrylic paint.

https://elizabethr-thecraftyrobin.blogspot.com

Stipple the next layer using Sedona, leaving a little orange peeping through.

https://elizabethr-thecraftyrobin.blogspot.com

Build up the layers using light brown, and if needed a little more of the other two colours until you are happy with your background.

https://elizabethr-thecraftyrobin.blogspot.com

Stencil the tree branches, script and the moon using a mix of light brown paint with a little black gesso added to darken it up.

https://elizabethr-thecraftyrobin.blogspot.com

Create splatters with a mix of white gesso and orange paint.

https://elizabethr-thecraftyrobin.blogspot.com

Making sure the light orange splatters are dry, go back over and add splatters of diluted gold wax to create a sky full of stars.

https://elizabethr-thecraftyrobin.blogspot.com

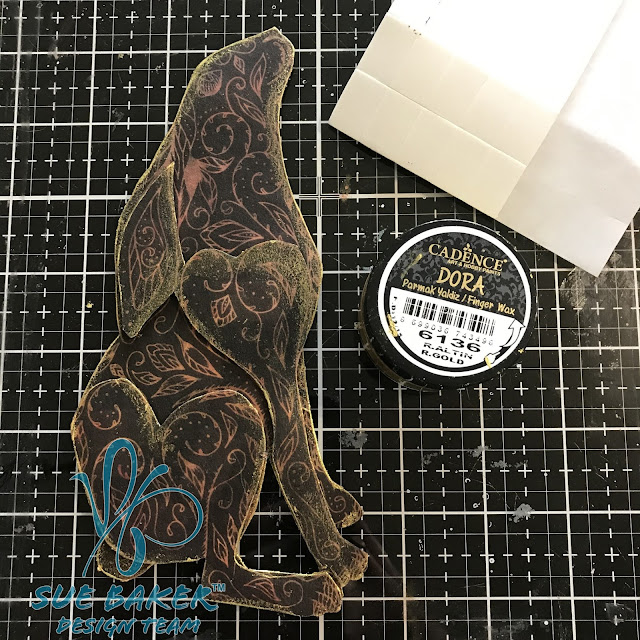
Adhere two Hare images to a scrap of acrylic packaging using the fabric decoupage glue, and leave to dry.

https://elizabethr-thecraftyrobin.blogspot.com

Once dry carefully cut out and decoupage the layers. Add a fine layer of gold wax to the edges to create a more defined edge.

https://elizabethr-thecraftyrobin.blogspot.com

Adhere the Hare to the canvas using raised foam pads.

https://elizabethr-thecraftyrobin.blogspot.com

Happy Crafting
Elizabeth x


Imagination Crafts USB2 - Divine


https://elizabethr-thecraftyrobin.blogspot.com/2020/08/imagination-crafts-usb2-divine.html

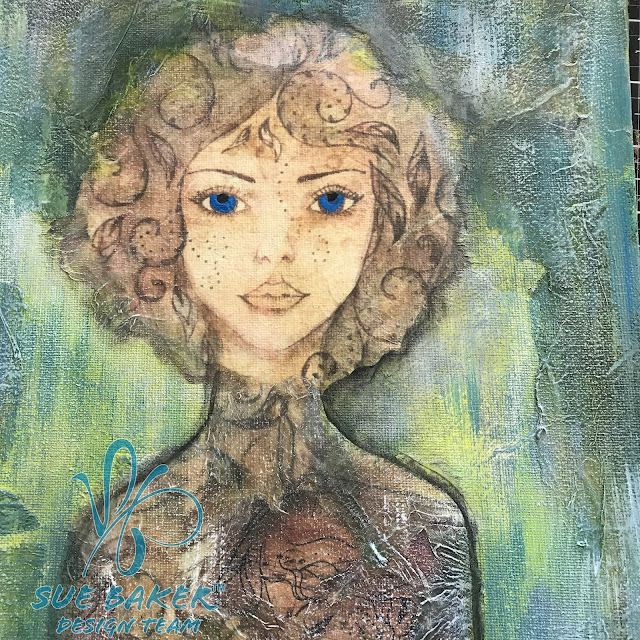
Print out one sheet of the rice paper and using a wet paintbrush take out the girls head.

https://elizabethr-thecraftyrobin.blogspot.com/2020/08/imagination-crafts-usb2-divine.html

Adhere it to your canvas quite near to the top.

https://elizabethr-thecraftyrobin.blogspot.com/2020/08/imagination-crafts-usb2-divine.html

Using a pencil take the lines down from the neck and create shoulders and a basic body shape.

https://elizabethr-thecraftyrobin.blogspot.com/2020/08/imagination-crafts-usb2-divine.html

Decoupage the body using the paler shades of browns from the left-over rice paper.

https://elizabethr-thecraftyrobin.blogspot.com/2020/08/imagination-crafts-usb2-divine.html

Create a border around the edge of the canvas using the darker pieces of the left-over rice paper.

https://elizabethr-thecraftyrobin.blogspot.com/2020/08/imagination-crafts-usb2-divine.html

Dry brush the entire canvas using white gesso. Make sure the canvas is dry and start building the backgound colour, using pistachio green, royal blue and delano. Dry and knock back with a light dry brushing of white gesso.

https://elizabethr-thecraftyrobin.blogspot.com/2020/08/imagination-crafts-usb2-divine.html

Add shading to the image using dilute black gesso, making sure it's well blended into the background, so there are no harsh lines.

https://elizabethr-thecraftyrobin.blogspot.com/2020/08/imagination-crafts-usb2-divine.html

Add stencilling using black gesso and define the eyes, cheeks and lips using and combination of paints and paint pens.

https://elizabethr-thecraftyrobin.blogspot.com/2020/08/imagination-crafts-usb2-divine.html

Happy Crafting.
Elizabeth x

Imagination Crafts USB 2 - Natures Creation


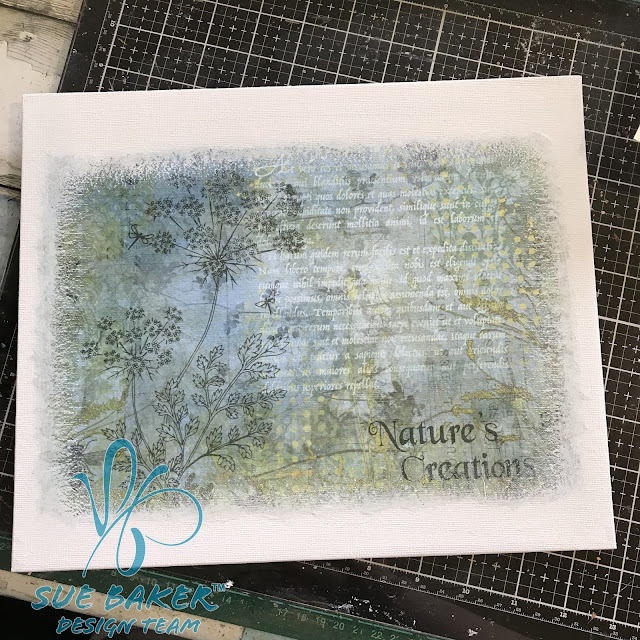
Print out the Natures Creation paper from USB2 and with a damp paintbrush wet the edges of the paper and gently tear away the edge.

https://elizabethr-thecraftyrobin.blogspot.com/2020/08/imagination-crafts-usb-2-natures.html

Adhere to the centre of the canvas and dry. Once cool dry brush around the edges with white gesso.

https://elizabethr-thecraftyrobin.blogspot.com/2020/08/imagination-crafts-usb-2-natures.html

Using the Owl and Butterfly stencil from the Destiny collection, stipple the base layer using white gesso and dry.

https://elizabethr-thecraftyrobin.blogspot.com/2020/08/imagination-crafts-usb-2-natures.html

Paint in the flowers and foliage using diluted white gesso.

https://elizabethr-thecraftyrobin.blogspot.com/2020/08/imagination-crafts-usb-2-natures.html

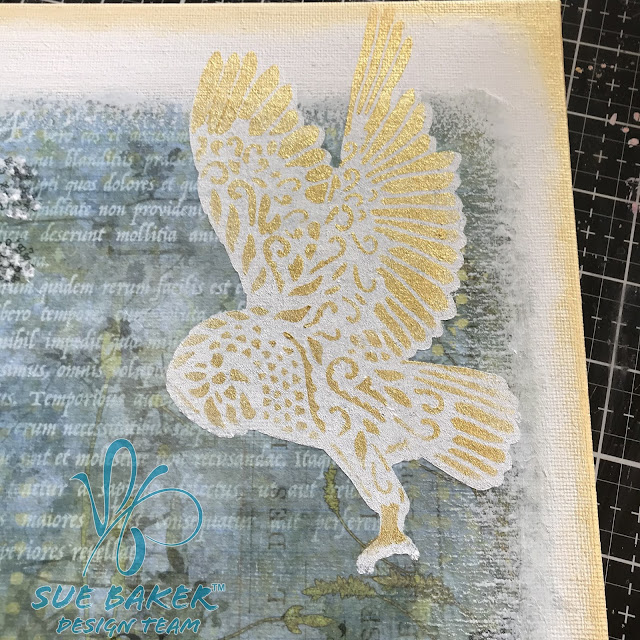
Using the 2nd layer stencil, stipple through using gold wax, before cleaning the remaining wax from the brush around the edge of the canvas to create a border.

https://elizabethr-thecraftyrobin.blogspot.com/2020/08/imagination-crafts-usb-2-natures.html

Happy Crafting.
Elizabeth x


Thursday, 9 July 2020

Imagination Crafts New Releases


Start by adding three blobs of blue, cream and green onto your canvas.


Blend them together to create an ombre.


Using white gesso create fluffy white clouds in the sky.


Then using a mix of the green and the whie gesso, create a field grasses for your stencilled roes to sit on.


Use a black paint pen to add birds and also a few random dots inbetween the grasses to create an illusion of insects flying around.

Finish by adding white highlights with a whie paint pen.


Happy Crafting
Elizabeth x

Friday, 6 March 2020

The Craft Stamper Magazine Challenge March 2020


It's the first Friday in March so that's means we have a new challenge launching over at the Craft Stamper Magazine Blog


As always we have a fabulous prize up for grabs along with the chance to be featured in the magazine it's self, how cool is that!


So hop over to the blog (via the link above) check out the entry information get stamping, and join in the fun.

You can grab a copy of the magazine at most craft shops and of course WH Smith. If your local craft store doesn't stock it then get them to contact the magazine and they can be added to the list of stockists.

Happy Crafting,
Elizabeth x

Friday, 10 January 2020

The Craft Stamper Magazine January 2020 Challenge


Happy New Year and welcome to the firs challenge for 2020 over at the Craft Stamper Magazine Blog

We would love you to share your projects using "real" stamping on them with us, for a chance to be in winning a fabulous prize.

Check this out......


What a great prize to top up your New Year stash! And don't forget you are also in with a chance to be featured in the magazine it's self, how cool is that.

So hop over to the blog (via the link above) to check out the guidelines, and get stamping.

Happy Crafting,
Elizabeth x

Wednesday, 23 October 2019

Eileen Hull's Pocket Notebook


I really need somewhere to keep my paint and ink swatches recorded. I'm forever buying the same colour twice, and I must admit I love seeing the rainbow of colours down on paper!

So I started by cutting out Eileen's new Pocket Notebook, keeping the full width of the spine so I could have five signatures or spaces for colour charts.

Love all things beachy, the colours, the textures and of course the fabulous images. I love the Cadence Rusty Patina's and the effects you can create. I started by adding Patina Brown around all the edges and the spine, using a stencil brush.


Then using the same method of application added the Patina Mold Green, blending it out into the Patina Brown.


The to add a few highlights I stippled on a little of the Ecru. This knocks back the dark colours and makes the Notebook a little more coastal shabby.


Don't forget when the spine is folded you can see the white of the Matt Board, so add a little more Patina to get rid of the white.


Next I added my design using one of the Cadence stencils I brought back from my trip over to their academy in August. It has a mix of coastal designs and is perfect for the cover. I used a mix of both white and black gesso through the stencil.


To stay with the organic feel of the notebook I used Sari Silk to create somewhere for my charts to slip into, instead of elastic. I only used three sections, and to add decoration to the outside, I tied all the strands  together in the centre. I will hunt out some shell charms to add on later.


Love how this one turned out, I am so pleased. And I can have fun creating the charts to fit inside now.


Hope I've inspired you to try something a little different.


Happy Crafting.
Elizabeth xxx